搭建个人博客需要用到两个软件git和node.js,所以请先安装完成这两个软件。本教程仅适用于windows平台。
一、 github的配置
我们在本地写完博客以后,会提交到github上。github提供了两种认证方式:用户名密码和ssh。如果使用用户名和密码的认证方式,那么我们每次提交到github的时候都会要求我们输入用户名和密码,这种方式用户体验不好。所以,我们使用ssh认证方式,即在本地生成一对私钥和公钥,然后把公钥添加到自己在github的账号信息里,这样提交博客到github上时会自动完成认证过程。
1.1 检查ssh密钥是否已经存在
首先,我们需要检查自己的机器上是否已经存在ssh密钥,打开git bash并输入以下命令$ ls -al ~/.ssh
# Lists the files in your .ssh directory, if they exist
如果存在 id_rsa.pub 和 id_rsa这两个文件,说明之前已经生成过ssh密钥,请忽略步骤1.2
1.2 生成ssh密钥
打开git bash,执行以下命令,别忘了将邮箱地址替换成自己在github上的邮箱地址。ssh-keygen -t rsa -C "your_email@example.com"
# Creates a new ssh key, using the provided email as a label
Generating public/private rsa key pair.
让密钥文件保存在默认位置,直接按回车键即可。Enter file in which to save the key (/Users/you/.ssh/id_rsa): [Press enter]
输入一个使用密钥文件时需要输入的密码(不然每个人都可以随便使用此密钥文件来访问你的github)Enter passphrase (empty for no passphrase): [Type a passphrase]
Enter same passphrase again: [Type passphrase again]
输入密码之后,界面会输出成功生成密钥的信息Your identification has been saved in /Users/you/.ssh/id_rsa.
Your public key has been saved in /Users/you/.ssh/id_rsa.pub.
The key fingerprint is:
01:0f:f4:3b:ca:85:d6:17:a1:7d:f0:68:9d:f0:a2:db your_email@example.com
1.3 把公钥添加到自己的github账号
打开公钥文件/Users/you/.ssh/id_rsa.pub,复制一下里面的全部内容。需要注意的一点是,复制公钥的时候不能多了换行符或者空格,否则添加公钥时会失败。然后,参见github的添加ssh密钥的官方文档的“Step 4: Add your SSH key to your account”章节,将自己的公钥添加到github账号。
1.4 测试是否能ssh连接到github
打开git bash,输入ssh -T git@github.com
# Attempts to ssh to GitHub
你会看到以下信息The authenticity of host 'github.com (207.97.227.239)' can't be established.
RSA key fingerprint is 16:27:ac:a5:76:28:2d:36:63:1b:56:4d:eb:df:a6:48.
Are you sure you want to continue connecting (yes/no)?
输入yes,看到以下信息说明ssh配置成功Hi username! You've successfully authenticated, but GitHub does not
provide shell access.
二、 github pages的配置
首先,github是一个具有版本管理功能的代码仓库,我们可以在上面建立多个项目。每一个项目会有自己的一个默认主页,主页内只会列出项目的源文件。这对于一个新手来说,不知从何入手。人们需要有一个对这个项目的具体介绍的主页,以帮助第一次接触这个项目的人对此项目有一个大概的了解。所以我们应该自定义项目的主页,来代替原本只是列出项目源文件的主页。github pages就是完成这样的功能的。github pages能够建立两种类型的网站,第一种是为每一个github用户或者组织建立的网站,用来介绍该用户或组织,这种网站每个用户或者组织只能建立一个;第二种是为用户或者组织的github上的项目建立的网站,用来介绍项目的情况,这种网站每个用户或者组织能建立多个。我们搭建个人博客需要建立的网站是第一种网站,所以需要在github上新建一个项目,这个项目的名字有特殊的要求,即项目的名字必须符合“username.github.io”这种格式,其中username是自己在github上的账户名称。
三、 git的配置
Git会根据用户的名字和邮箱来记录提交,GitHub也是用这些信息来做权限的处理。所在在使用git向github提交文件之前,需要先在git中设置自己的github用户名和邮箱。$ git config --global user.name "github_user_name"
$ git config --global user.email "your_email@youremail.com"
四、 hexo的配置
hexo是一款基于node.js的静态博客框架。
4.1 安装hexo
打开git bash,执行以下命令$ npm install hexo-cli -g
4.2 新建并初始化博客项目blog
打开git bash,执行以下命令$ hexo init blog
$ cd blog
$ npm install
4.3 在本地浏览博客界面
打开git bash,执行以下命令$ hexo server
然后,打开浏览器,输入网址http://127.0.0.1:4000/,看到如下图所示的经典的“hello world”,说明配置成功。我们看到的“hello world”文章是hexo为我们发出的第一篇博客。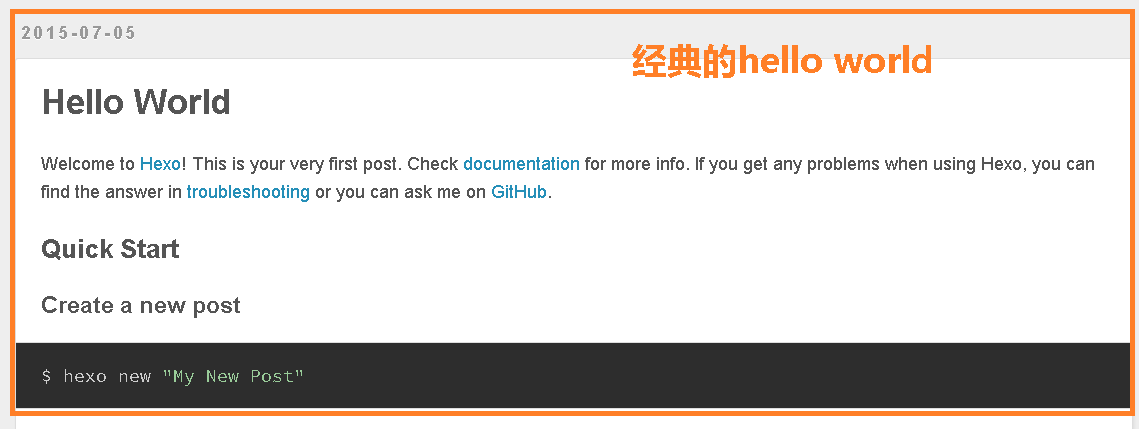
五、 利用hexo写一篇博客并发布到github
5.1 新建一篇博客
在git bash中将当前目录切换到上一步骤中的blog目录$ hexo new 'your_first_blog_title'
这时,会生成blog/source/_posts/your_first_blog_title.md文件
5.2 编辑博客
用自己喜欢的编辑工具打开your_first_blog_title.md文件,利用markdown语法来编辑博客,保存。
5.3 修改项目配置文件
打开blog/_config.yml,修改以下内容# Deployment
## Docs: http://hexo.io/docs/deployment.html
deploy:
type: git
repo: git@github.com:user_name/user_name.github.io.git
branch: master
5.4 生成静态网站
$ hexo generate |
5.5 发布到github
$ hexo deploy |
5.6 欣赏
在浏览器中输入网址https://user_name.github.io,欣赏一下自己刚刚发布的博客吧!
六、 ssh-agent的配置
在上一步骤中提交文件到github的时候,会让我们输入访问密钥证书的密码。每次都要这样,怎么破呢?ssh-agent可以帮助我们解决这个问题。我们需要在打开git bash的时候自动运行ssh-agent,所以需要把下面的shell代码复制到~/.profile或者~/.bashrc文件中。# Note: ~/.ssh/environment should not be used, as it
# already has a different purpose in SSH.
env=~/.ssh/agent.env
# Note: Don't bother checking SSH_AGENT_PID. It's not used
# by SSH itself, and it might even be incorrect
# (for example, when using agent-forwarding over SSH).
agent_is_running() {
if [ "$SSH_AUTH_SOCK" ]; then
# ssh-add returns:
# 0 = agent running, has keys
# 1 = agent running, no keys
# 2 = agent not running
ssh-add -l >/dev/null 2>&1 || [ $? -eq 1 ]
else
false
fi
}
agent_has_keys() {
ssh-add -l >/dev/null 2>&1
}
agent_load_env() {
. "$env" >/dev/null
}
agent_start() {
(umask 077; ssh-agent >"$env")
. "$env" >/dev/null
}
if ! agent_is_running; then
agent_load_env
fi
# if your keys are not stored in ~/.ssh/id_rsa or ~/.ssh/id_dsa, you'll need
# to paste the proper path after ssh-add
if ! agent_is_running; then
agent_start
ssh-add
elif ! agent_has_keys; then
ssh-add
fi
unset env
保存文件后,在第一次打开git bash的时候,会提示我们输入访问ssh密钥的密码,我们输入正确的密码之后,以后再提交博客到github的时候就是完全自动化的。